S_BlurMotion

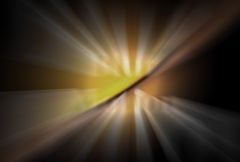
Performs a motion blur of the source clip between the specified From and To transformations. This can be used to perform radial zoom blurs, rotate blurs, directional blurs, or any combination of these. The From and To parameters do not refer to time. They describe the two transformations in space that determine the style of blur applied to each frame.

In the Sapphire Blur+Sharpen effects submenu.


Inputs:

Source:  The current layer.   The clip to be processed.

Matte:  Defaults to None.   If provided, the amount of motion blur is scaled by this input for each destination pixel. This input can be affected using the Blur Matte, Invert Matte, or Matte Use parameters.
        

Parameters:

Mode:   Popup menu,  Default: Blur Color.
Selects between full color or monochrome result.
Blur Color:  blurs all the channels of the source input.
Blur Mono:  makes the source monochrome and then blurs the resulting single channel (faster).

Center:   X & Y,   Default: [360 243],  Range: any.
The center of rotation and zooming, in screen coordinates relative to the center of the frame. The shift values should be zero for this location to make sense.

From Z Dist:   Default: 1,  Range: 0.001 or greater.
The 'distance' of the From transformation. This zooms about the Center location when Shift is 0. Increase to zoom out, decrease to zoom in.

From Rotate:   Default: 0,  Range: any.
The rotation angle of the From transformation, in degrees, about the center.

From Shift:   X & Y,   Default: [0 0],  Range: any.
The horizontal and vertical translations of the From transformation. This can be used for directional motion. If it is non-zero the center location becomes less meaningful.

To Z Dist:   Default: 0.8,  Range: 0.001 or greater.
The 'distance' of the To transformation. Increase to zoom out, or decrease to zoom in.

To Rotate:   Default: 0,  Range: any.
The rotation angle of the To transformation, in degrees, about the center. Note that if the From and To Rotate angles are very different, the interpolation between them will become less accurate.

To Shift:   X & Y,   Default: [0 0],  Range: any.
The horizontal and vertical translations of the To transformation. This can be used for directional motion. If it is non-zero the center location becomes less meaningful.

Exposure Bias:   Default: 0.5,  Range: 0 to 1.
Determines the variable amount of exposure along the path between the From and To transformations. A value of 0 causes more exposure at the From end, 0.5 causes equal exposure along the path, and 1.0 causes more exposure at the To end. If you have bright spots on a dark background, a 0 value would cause the processed spots to be brighter at the From end and dark at the To end, and a 1.0 value would cause the opposite.

Brightness:   Default: 1,  Range: 0 or greater.
Scales the brightness of the result.

Wrap:   X & Y,  Popup menu,  Default: [No No].
Determines the method for accessing outside the borders of the source image.
No:  gives black beyond the borders.
Tile:  repeats a copy of the image.
Reflect:  repeats a mirrored copy. Edges are often less visible with this method.

Blur Res:   Popup menu,  Default: Full.
Selects the resolution factor for the motion blur. This is similar to the general 'Res' factor parameter, but does a better job of averaging down to lower resolution and interpolating back up to the result. Higher resolutions give better quality, lower resolutions give faster processing.
Full:  Full resolution is used.
1/2:  The motion blurring is performed at half resolution.
1/4:  The motion blurring is performed at quarter resolution.

Subpixel:   Check-box,  Default: on.
If enabled, uses a better quality but slightly slower method for performing the blur.

Blur Matte:   Default: 0,  Range: 0 or greater.
Blurs the Matte input by this amount before using. This can provide a smoother transition between the matted and unmatted areas. It has no effect unless the Matte input is provided.

Invert Matte:   Check-box,  Default: off.
If on, inverts the Matte input so the effect is applied to areas where the Matte is black instead of white. This has no effect unless the Matte input is provided.

Matte Use:   Popup menu,  Default: Luma.
Determines how the Matte input channels are used to make a monochrome matte.
Luma:  the luminance of the RGB channels is used.
Alpha:  only the Alpha channel is used.

Opacity:   Popup menu,  Default: Normal.
Determines the method used for dealing with opacity/transparency.
All Opaque:  Use this option to render slightly faster when the input image is fully opaque with no transparency (alpha=1).
Normal:  Process opacity normally.
As Premult:  Process as if the image is already in premultiplied form (colors have been scaled by opacity). This option also renders slightly faster than Normal mode, but the results will also be in premultiplied form, which is sometimes less correct.

Show From Transfm: Check-box, Default: off.
Turns on or off the screen user interface for adjusting the From Z Dist and From Rotate parameters.This parameter only appears on AE and Premiere, where on-screen widgets are supported.

Show To Transform: Check-box, Default: off.
Turns on or off the screen user interface for adjusting the To Z Dist and To Rotate parameters.This parameter only appears on AE and Premiere, where on-screen widgets are supported.

Show From Shift: Check-box, Default: off.
Turns on or off the screen user interface for adjusting the Opacity parameter.This parameter only appears on AE and Premiere, where on-screen widgets are supported.

Show To Shift: Check-box, Default: off.
Turns on or off the screen user interface for adjusting the Opacity parameter.This parameter only appears on AE and Premiere, where on-screen widgets are supported.

See Also:

BlurMoCurves
Blur
Streaks
WarpRepeat
WarpChroma
EdgeRays
Sapphire Plug-ins Introduction


© 2007, GenArts, Inc. All rights reserved.